sewing tutorial: project bag
Well, for better or for worse I'm going ahead with the tutorial for sewing a project bag. Some of the pictures aren't great, but I think they all show what to do.
First, though, let's have a look at the one that failed. I used really cheap chambray (don't remember what I got it for in the first place) and thought I'd dress it up a little bit with some, er, whimsical polka dots. Did not realize it looks like I was trying to make a stoplight until after I stitched them down (slaps head):
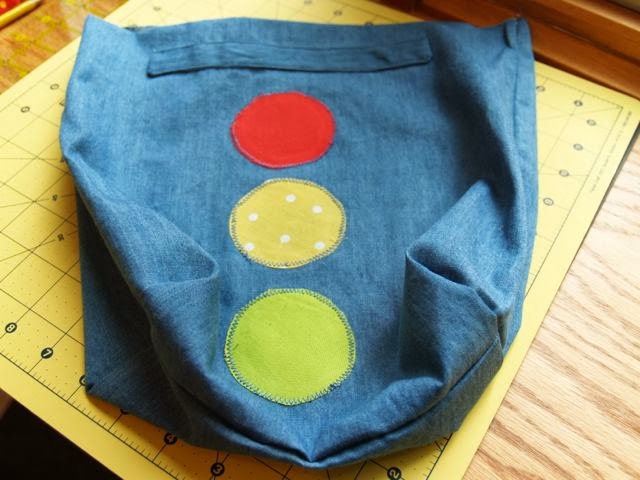 |
| See why I'm not cut out for this?? |
Then I noticed that the tension was all screwed up for the side seams and I decided to chuck it. Some things aren't worth salvaging.
Materials:
about 1/2 yard fabric for outside and drawstring casing (dark blue pictured below)
about 1/2 yard fabric for lining (yellow pictured below)
small amount contrasting fabric for decoration (optional, green and red pictured below)
1.5 yards ribbon or twill tape for drawstring

Tools and other supplies:
rotary cutter, ruler and mat (not absolutely necessary, but makes cutting a lot easier)
double-sided fusible stuff like Wunder Under (if you plan to decorate the outside)
marking chalk or marker
thread, iron, sewing machine

Cut out your fabric:
Cut out two squares 13"x13" out of the main fabric.
Cut out two squares 13"x13" out of the lining fabric.
(Note: This makes the largest size bag. If you want it smaller, cut out 11"x11" or 12"x12". I wouldn't go smaller than 11"x11" or your finished bag won't hold much more than an already-knit sock.)
If you want to decorate the outside:
Use your fusible stuff (like Wunder Under) on the smaller scraps of fabric and cut out some shapes. I traced a small drinking glass to get circles.

Arrange on the fabric.

Peel off the paper backing.

Iron that down.

Stitch around the outside of the decorative pieces with a narrow zigzag.

Next, it's time to mark the casing for the drawstring. (Someday I would like to try just cutting a couple of buttonholes instead of sewing on a separate casing, but unfortunately my sewing machine just turns into an evil fabric-eating monster whenever I try using a buttonhole stitch, so that's not going to happen.)
Anyway, using your marking apparatus (I used chalk, but you can use a fabric marker or pencil), measure 2" down from the top of the bag and 3" in from the side.

Using a straight edge, draw a straight line connecting those marks. Repeat for the other outside piece.

Make the drawstring casing.
Cut out two rectangles that measure 2.5"x8". You can use the same fabric as the main outside of the bag (like I did) or pick something that contrasts. These casings go on the outside of the bag.
Turn under the long sides 1/4" and press.

Fold one casing rectangle in half lengthwise with the folded edges on the outside and stitch along the short sides. Repeat for the second casing.

I know these pictures are blurry and hard to see, sorry. Bear with me.
Now turn those casings right side out and press. The turned-under raw edges are now on the inside and the corners are nice and neat.

Pin one casing to the outside piece over the chalk line and pin in place.
Topstitch along the long edges of the casing, leaving the short sides open. That's where you'll pull the drawstrings through. The top stitching also closes up that long edge with the raw edges turned in.
Repeat this with the other outside bag piece, so you now have casings on each of the outside bag pieces.

*Now, we're going to make the bag 3-D!
Take your marking chalk (or marker, or whatever), and mark off a 2" square on both bottom corners of the outside pieces.

Cut out those 2" from the corners.

With right sides together, sew the sides and bottom together. I used a 3/8" seam. (You can use slightly bigger or smaller as long as you're consistent.)
In this step, do NOT stitch the corners you cut out.

NOW you'll sew up those corners. You do this by pulling open that corner and flattening it by lining up the side seam with the bottom seam. Stitch that closed.

Repeat this assembly for the lining, starting from * where you cut out the bottom corners.
We are almost done, people!!
Turn the bag inside out, turn the raw edge under about 1/2" and press to the inside.

Repeat with the lining.

Now, leave the lining inside out, but turn the main bag right side out. Put the lining inside the bag and pin all around the top. All those raw edges are hidden away now!

Topstitch all around the top of the bag.

The very last step is inserting the drawstring. Cut two drawstrings, each just a little more than double the width of your bag.

Using a safety pin, pull the first drawstring through both casings so both ends are on one side of the bag. Repeat with the other drawstring only with both ends on the other side of the bag. Tie a knot in the ends and pull shut like in the picture below (which is a different bag but better picture than any I had of the blue bag. Go figure.)

There are endless ways you can make these things. You can make the bag as big or small as you like. You can add or subtract depth by adjusting the size of the corners you cut out of the bottom. A deeper cut makes for a deeper bag.
You can also piece or decorate the bag as you like. I appliquéd these silly dots on the blue one, and pieces simple triangles and strips for the other two bags below. I made the blocks, then added strips all around the edges to come up with the final size square I needed for the outside pieces. If you do this, make sure you allow for the extra room on the sides and bottom or your beautifully pieced block might wrap around the sides or bottom and be harder to see (almost happened with the triangle blocked bag in the front, in fact.)
Maybe you have beads or buttons or sequins or old boy/girl scout badges begging to be used to decorate something. You can do a lot to make your project bags anything but plain and boring!


Comments
No, seriously, I love them. And they would be good for so many things. I think I'm going to make some for the girls.